Contents
Contents
One of the most common tools used to work with CSV files is Microsoft Excel. Microsoft’s ubiquitous spreadsheet program is everywhere in the business world and still remains the top dog, despite challenges from Google Sheets and others in the market. Chances are, if you work with CSV, at some point you will be working with Excel, or someone will send you an Excel file format. It’s important to know what to do with it, in particular if you are preparing a CSV import to a target system. So here will we walk through how to convert an Excel file to CSV.
Excel handles CSV files natively and can read both file types without difficulty. In some cases, you might not even realize you are working with a CSV. Here you can see two different files, one with a .csv extension, and one with .xlsx (excel). Can you tell the difference?
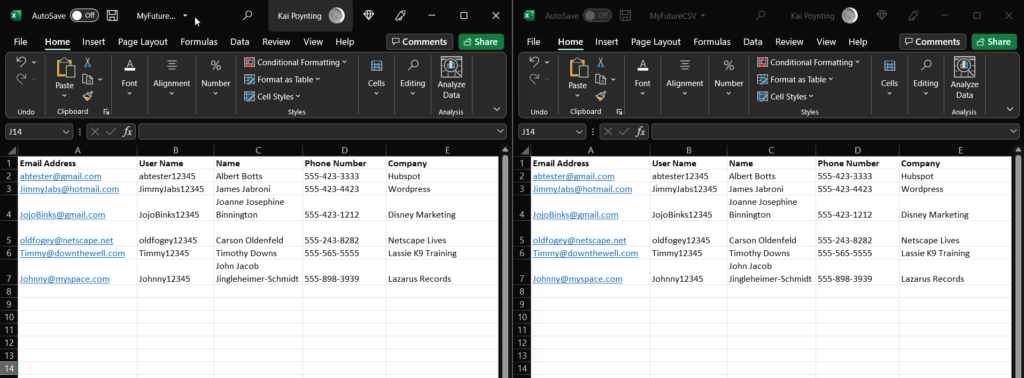
So first things first, which format are you working with? Did your colleague send you an excel sheet or a CSV? As we mentioned in a recent blog, a common user error is to think you can simply rename the file and change the extension to make an excel sheet into a CSV file. It is always a good idea to check the properties of the file just to make sure.
Checking the Properties
Fortunately, checking the properties is a simple task. First, find the file, wherever it may reside. Chances are if it was recently received, it will be in your Downloads folder, or you can find it in your recent files under Quick Access. We’ll use the latter option in this example.
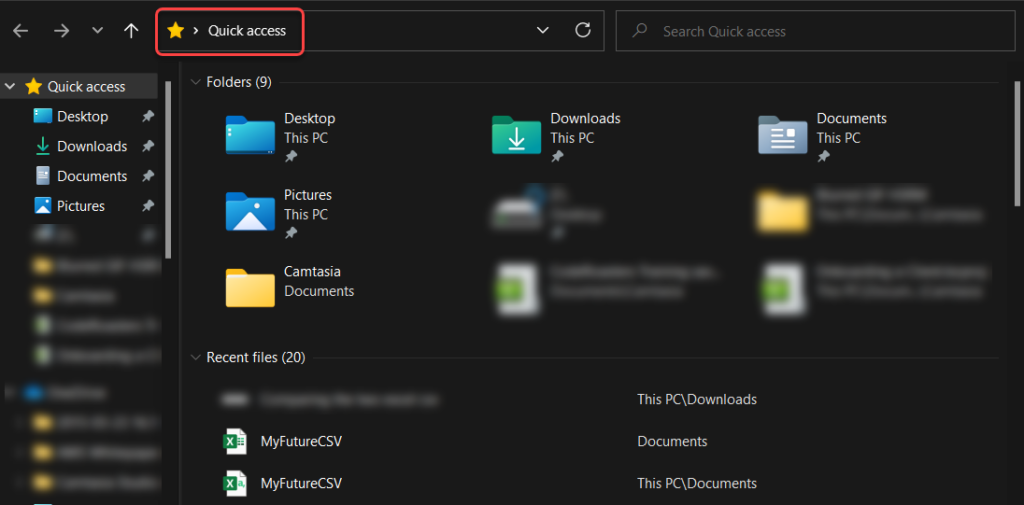
Note that the two files (both labelled MyFutureCSV) are present in the recent files section. But which is which? To determine this, right-click the file, and go to Properties.
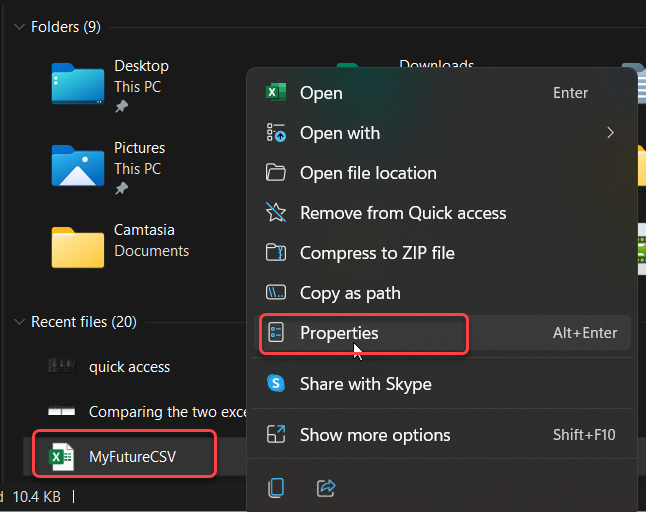
In the file properties, you will see ‘Type of File’. Here you will see whether the file is an Excel Worksheet file (.xlsx) or a ready to export CSV file. In this example, we see it is an Excel file.
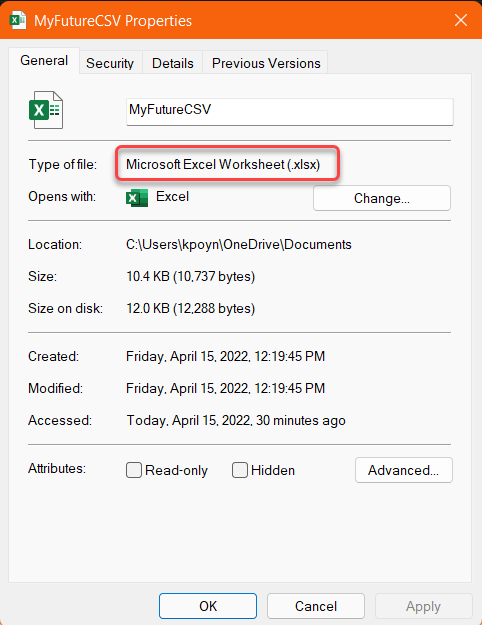
Note: In the file properties, be careful – you might see the excel logo beside ‘Opens with’ and at a glance assume it is an Excel file. In this case it is, but .CSV files will also show this logo, as both will open with Excel.
Converting the Excel Worksheet to CSV File
Now that we know that we are indeed working with an Excel Worksheet, it’s time to convert our file to an import-ready CSV file. Again, this is a simple task to complete.
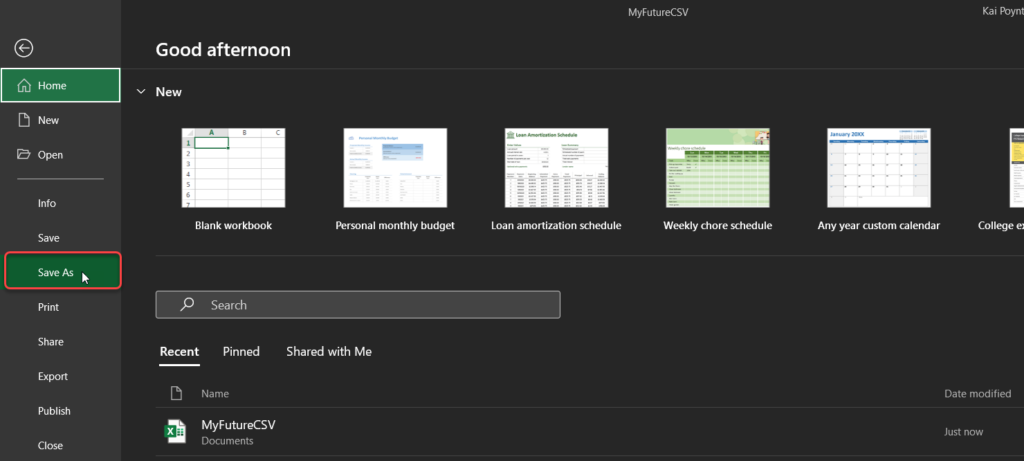
First, rather than simply clicking the disk icon to save the document, go under File, and select Save As.
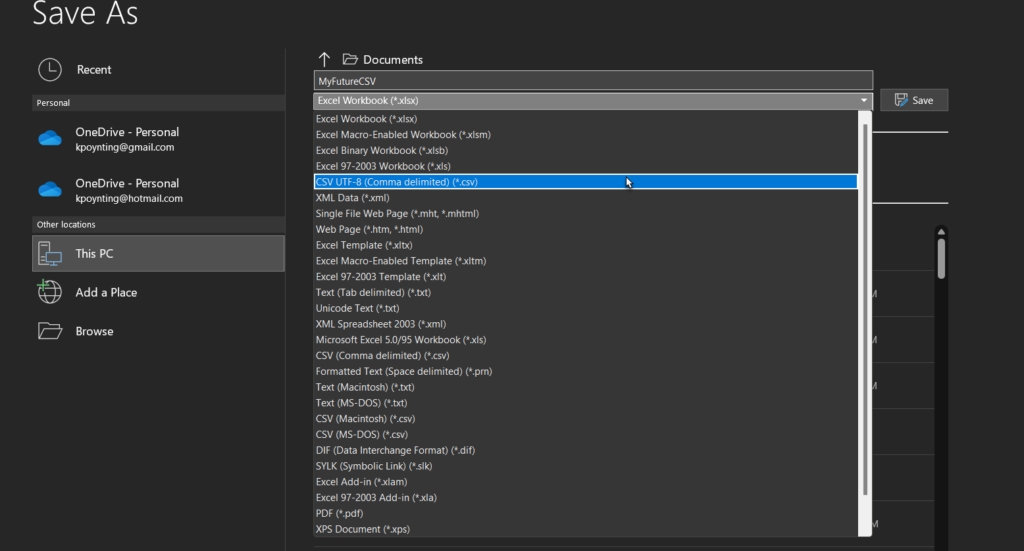
In the dropdown in which the file type is shown (it will default to the current file type), select CSV from the drop-down. Most modern systems will use the first option, CSV UTF-8. However, if importing to an older service or system, verify the correct CSV version for their solution, just to be safe.
That’s all there is to it. Remember, changing the name of the file to include a CSV extension does not actually change the file format. Be sure to check the file format before uploading to the service to ensure it is properly formatted and ready to go. Good luck importing your next CSV file!
Professional CSV Import Solution
Fuse is an enterprise-grade, embeddable CSV import solution.
Get the CEO's Take
Handpicked tech insights and trends from our CEO.
Professional CSV Import Solution
Fuse is an enterprise-grade, embeddable CSV import solution.
Get the CEO's Take
Handpicked tech insights and trends from our CEO.

What is IT OT Convergence? Streamlining Operations for Efficiency
Flatirons Development
Oct 28, 2025
Enterprise Computing: Transforming Business Operations
Flatirons Development
Oct 09, 2025
Best Data Analytics Strategy for Business Growth
Flatirons Development
Aug 25, 2025
Team Lead vs Manager: Understanding the Key Differences
Flatirons Development
Aug 07, 2025
Exploring the Crucial Stages of a Startup Journey
Flatirons Development
Jul 16, 2025
Business Intelligence Benefits: Unlock Data-Driven Growth
Flatirons Development
Jul 08, 2025