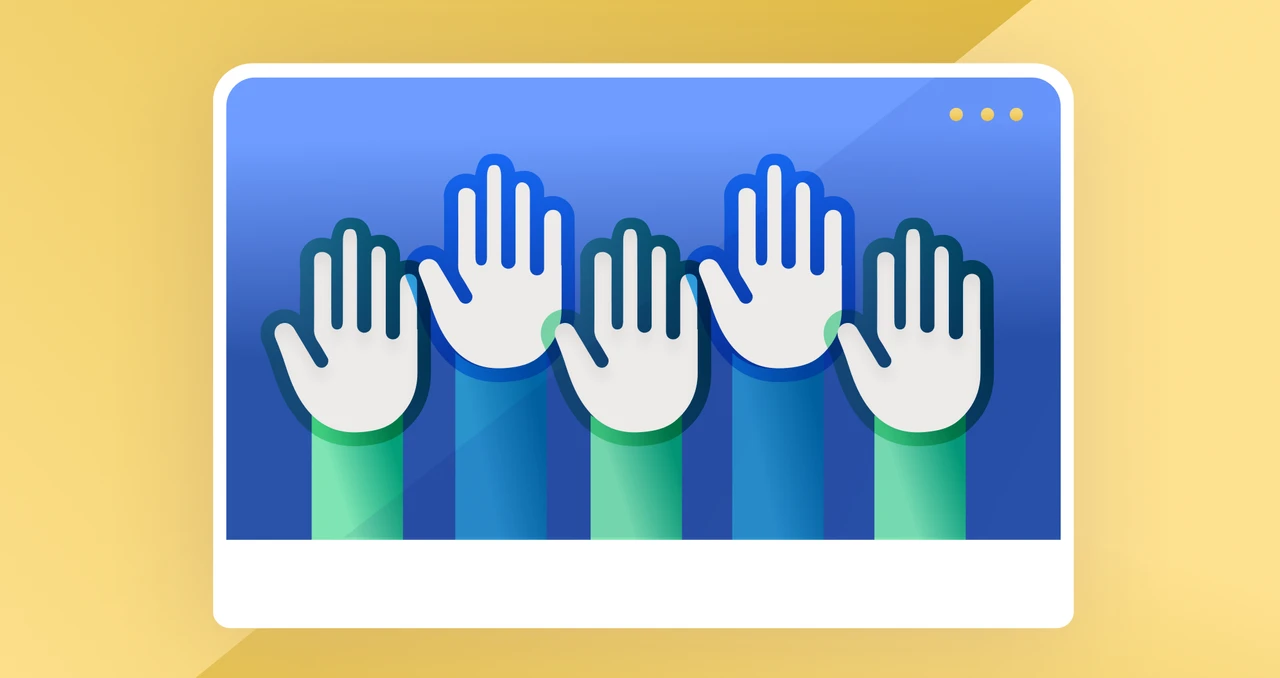
At Flatirons, we use the “raise your hand” functionality in Google Meets to signify that someone wants to talk in group meetings. However, we recently downgraded our Google Workspace account, and the functionality was lost. It turns out that hand-raising cost the company a few hundred dollars per month, and downgrading our plan removed it. So, I decided to build my own extension that works directly in the Google Workspace Starter plan. Here we will explore how I did that.
In this blog, we’re going to make use of Google’s own infrastructure to create a Google Chrome extension that will allow us to raise our hands in a Google Meeting. Google, this functionality is basic and should be included without cost. And now, with a little help from us, it will be. Let’s get started!
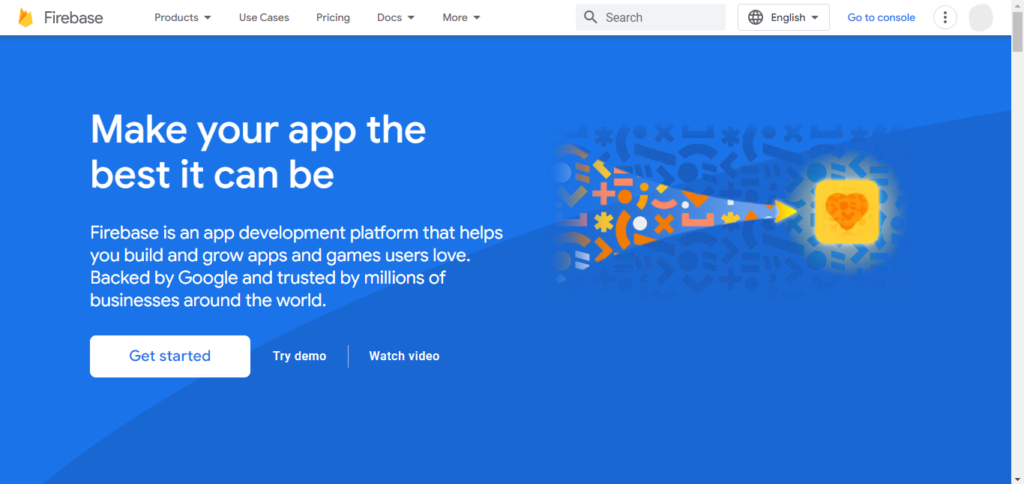
The first step in our journey is to create a free Firebase account. To create your account, go to https://firebase.google.com/ and sign in via google, or create a google account to use with Firebase. Once you have access to Firebase, create a new Firebase project by clicking Get Started.
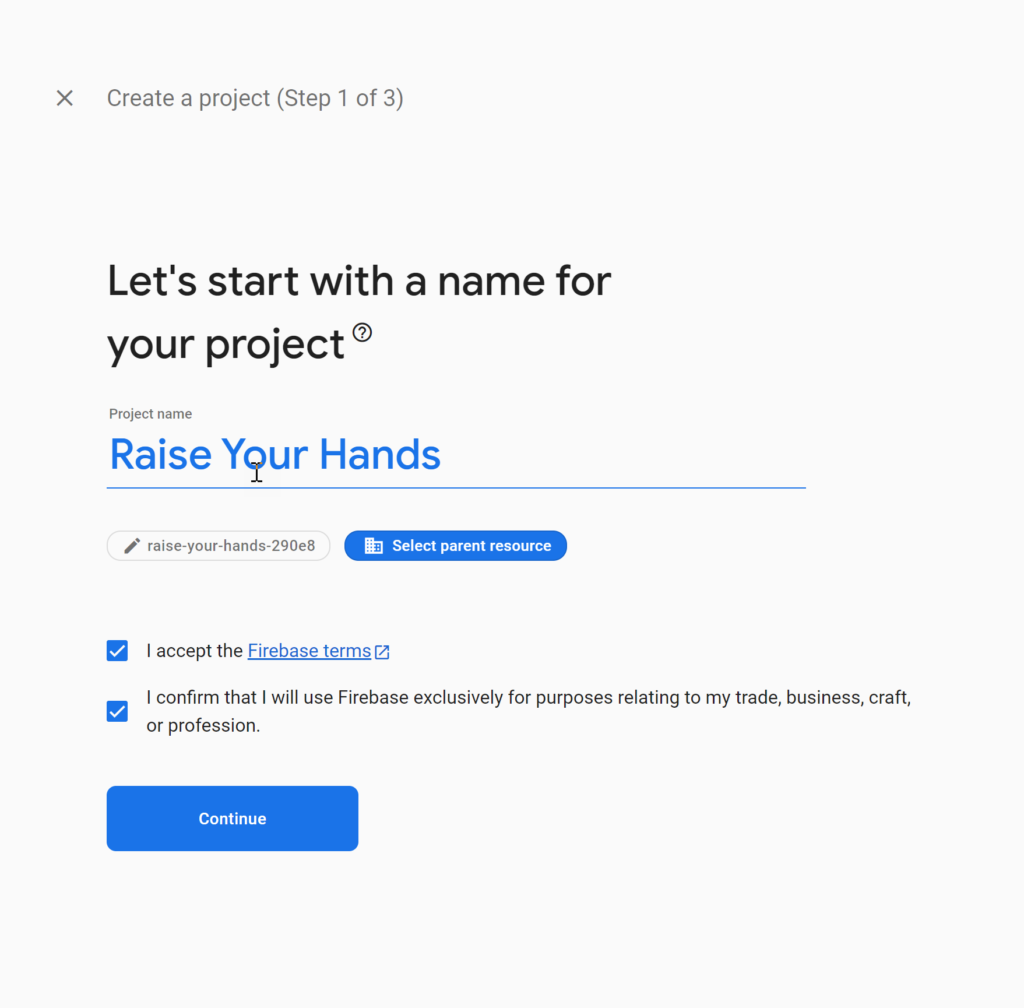
Provide a name for the project. In this case we’ll use ‘Raise Your Hands’. Click Continue.
You will next be asked whether you wish to include Google Analytics.
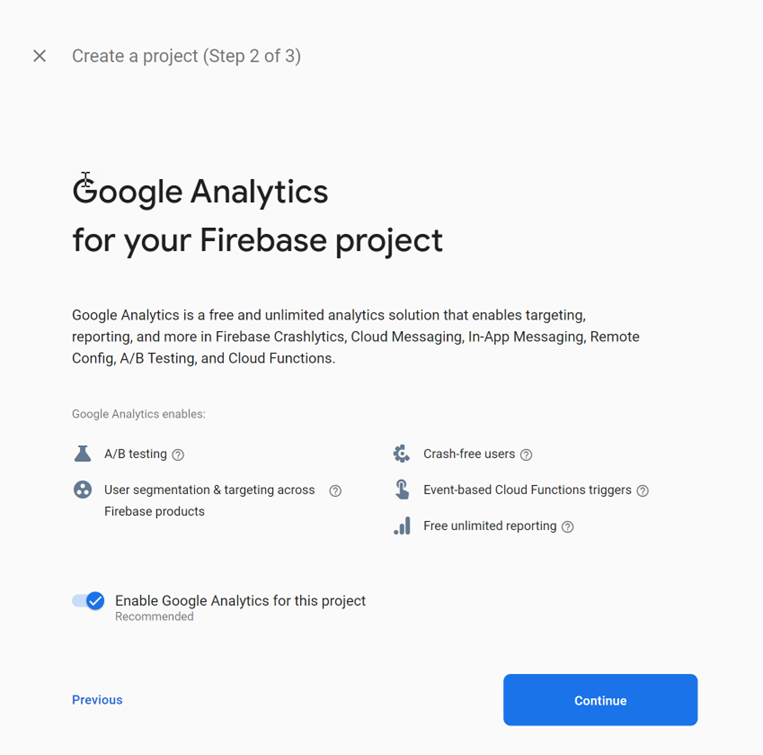
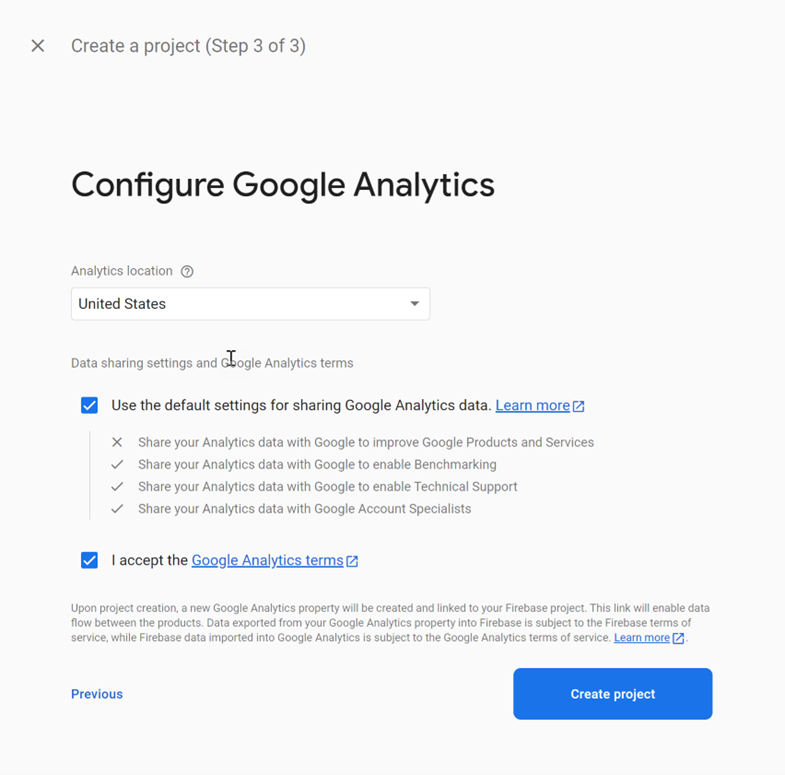
Finally, configure Analytics, and click Create Project.
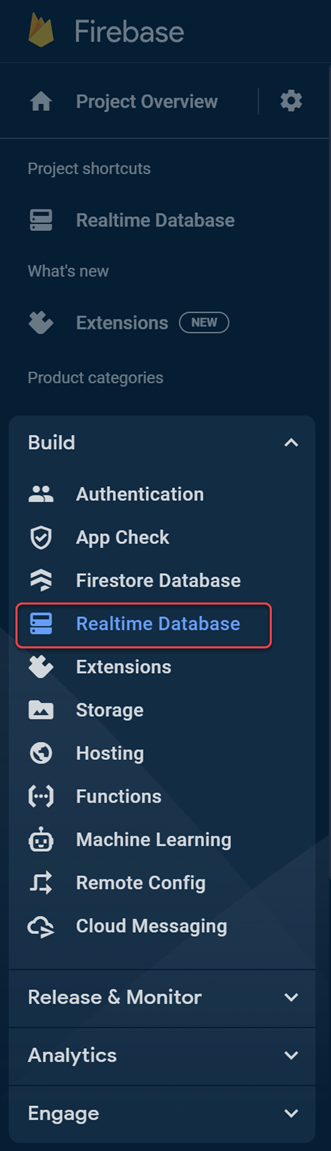
Once your project is created, you’ll need a Realtime database for our project. In the left-hand menu, under Product categories, expand Build, and select Realtime Database.
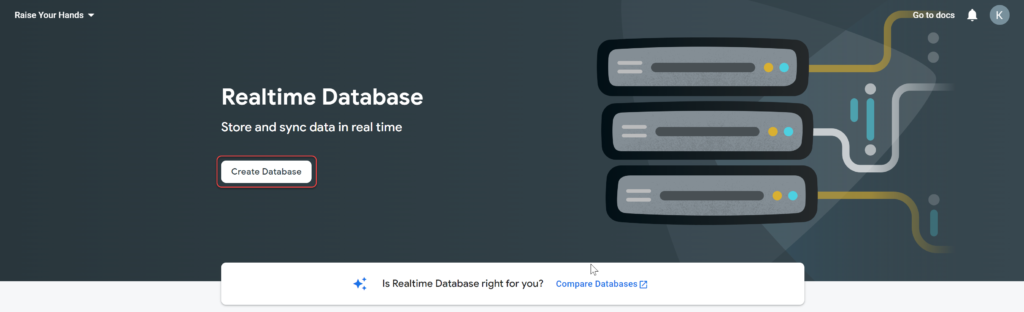
Click Create Database.
Select a database location and click Next.
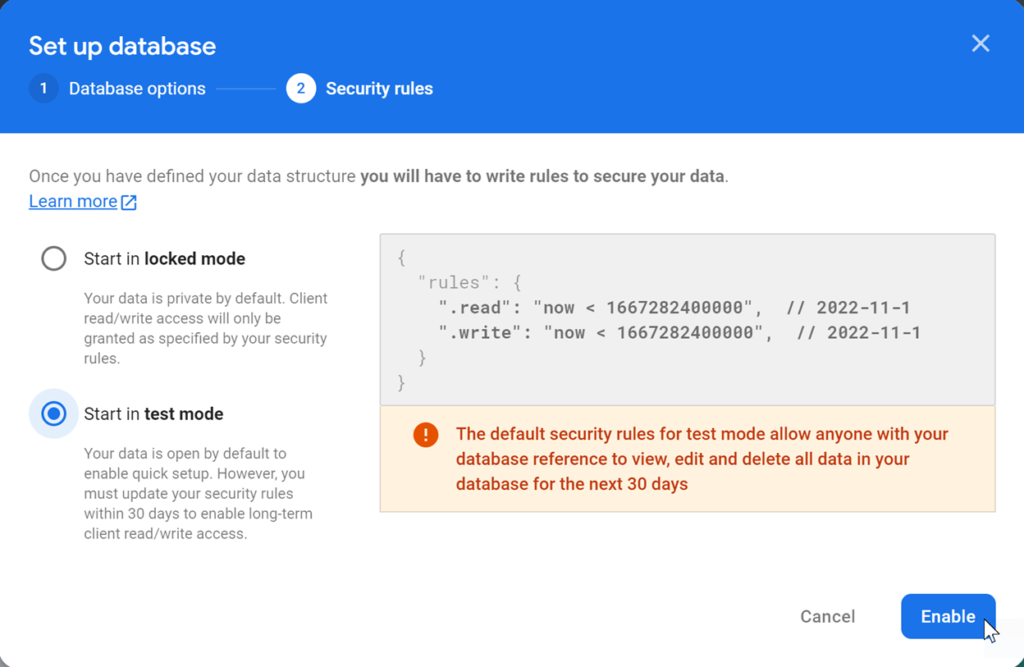
Finally, select Start in test mode.
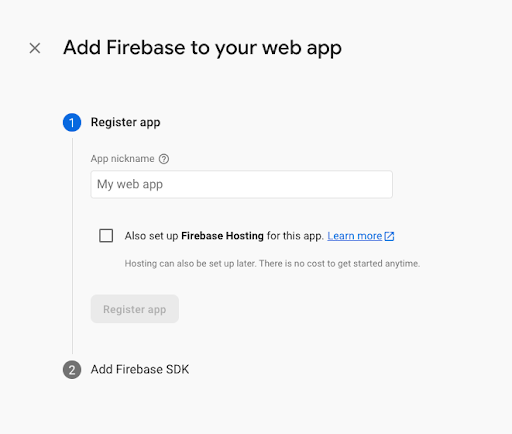
Next, create the application. Select the option to create a web application.
Enter the name of the app and register the application.
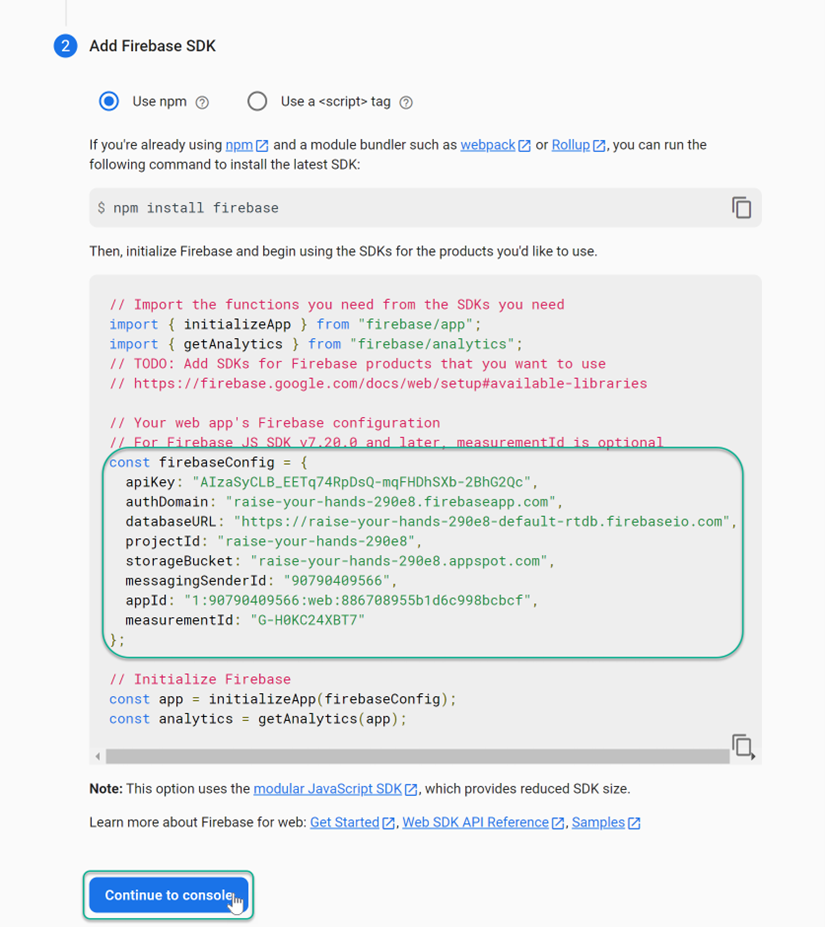
Once the app is registered, add the application via npm, and copy the credentials snippet. Click Continue to console.
Now we are ready to begin coding. As a React.js developer, for this project, we will use React v.18. We’ll create a new project using the command below.
npx create-react-app raise-your-hands --template typescript
For this project, we will use the Material UI library. Make sure to add the Firebase SDK.
yarn add @mui/material @mui/icons-material @emotion/react @emotion/styled firebase
If you have any questions about the Material UI installation, see the following link:
https://mui.com/pt/material-ui/getting-started/installation/
Let’s create a new component called “HandsUpList”. This component will help us to show the current hands-up list state.
import { Card } from "@mui/material";
import Avatar from "@mui/material/Avatar";
import List from "@mui/material/List";
import ListItem from "@mui/material/ListItem";
import ListItemAvatar from "@mui/material/ListItemAvatar";
import ListItemButton from "@mui/material/ListItemButton";
import ListItemText from "@mui/material/ListItemText";
import ListSubheader from "@mui/material/ListSubheader";
type Props = {
state: string[];
};
const HandsUpList = ({ state }: Props) => {
return (
<Card variant="outlined" sx={{ width: "100%", overflow: "hidden" }} >
<List dense sx={{ width: "100%", overflow: "hidden" }} >
<ListSubheader >Hands Up</ListSubheader >
{state. Map((name) = > {
return (
<ListItem key={name} disablePadding >
<ListItemButton >
<ListItemAvatar >
<Avatar alt={`Avatar ${name}`} >
{name.substring(0, 2).toUpperCase()}
</Avatar >
</ListItemAvatar >
<ListItemText
title={name}
primary={
<div
style={{
overflow: "hidden",
textOverflow: "ellipsis",
}}
>
{name}
</div >
}
/ >
</ListItemButton >
</ListItem >
);
})}
</List >
</Card >
);
};
export default HandsUpList;
Next, we need to provide the user’s name for use in the list. We will create a dialog component to ask the user for his name, and call it “FormDialog”.
import { useState } from "react";
import Button from "@mui/material/Button";
import Dialog from "@mui/material/Dialog";
import DialogActions from "@mui/material/DialogActions";
import DialogContent from "@mui/material/DialogContent";
import DialogContentText from "@mui/material/DialogContentText";
import DialogTitle from "@mui/material/DialogTitle";
import TextField from "@mui/material/TextField";
type FormDialogProps = {
isOpen: boolean;
onClose: () => void;
onRaiseMyHand: (name: string) => void;
};
const FormDialog = ({ isOpen, onClose, onRaiseMyHand }: FormDialogProps) => {
const [name, setName] = useState<string>("");
return (
<Dialog open={isOpen} onClose={onClose}>
<DialogTitle>Name</DialogTitle>
<DialogContent>
<DialogContentText>Please enter your name here.</DialogContentText>
<TextField
autoFocus
margin="dense"
required
label="Name"
type="text"
fullWidth
variant="standard"
onChange={(event) => setName(event.target.value)}
/>
</DialogContent>
<DialogActions>
<Button onClick={onClose}>Cancel</Button>
<Button disabled={!name} onClick={() => onRaiseMyHand(name)}>
Raise my hand
</Button>
</DialogActions>
</Dialog>
);
};
export default FormDialog;
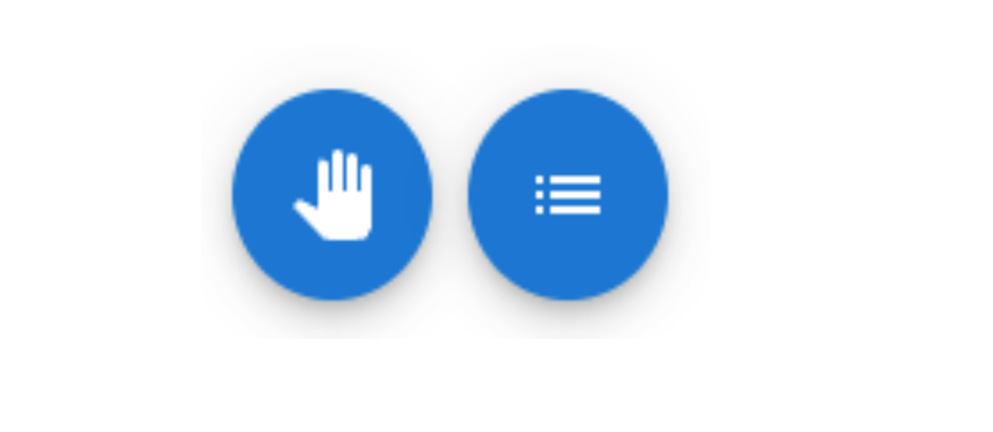
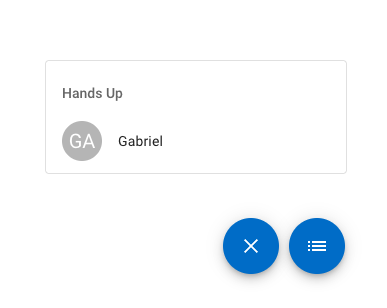
Now we have to modify our app component. Let’s create two floating action buttons, one to raise the hand and the other to display the hands-up list. Also, we need to ask for the user’s name. Your component should look like this one:
import CloseIcon from "@mui/icons-material/Close";
import ListIcon from "@mui/icons-material/List";
import PanToolIcon from "@mui/icons-material/PanTool";
import { Fab, Tooltip } from "@mui/material";
import Box from "@mui/material/Box";
import { useCallback, useEffect, useRef, useState } from "react";
import FormDialog from "./FormDialog";
import HandsUpList from "./HandsUpList";
function App() {
const nameRef = useRef<string>("");
const [isHandsUp, setIsHandsUp] = useState(false);
const [showHandsUpList, setShowHandsUpList] = useState(false);
const [showFormDialog, setShowFormDialog] = useState(false);
const [handsUpList, setHandsUpList] = useState<string[]>([]);
const toggleMyHand = useCallback(() => {
if (!nameRef.current) {
setShowFormDialog(true);
return;
}
const newIsHandsUp = !isHandsUp;
setIsHandsUp(newIsHandsUp);
}, [isHandsUp]);
const setNameAndRaiseHand = useCallback(
(name: string) => {
setShowFormDialog(false);
nameRef.current = name;
toggleMyHand();
},
[toggleMyHand]
);
useEffect(() => {}, []);
return (
<Box position="fixed" bottom={100} right={100} zIndex={9999}>
<Tooltip title="Raise your hand">
<Fab
color="primary"
aria-label="Raise your hand"
style={{ marginRight: 10 }}
onClick={() => toggleMyHand()}
>
{isHandsUp ? <CloseIcon /> : <PanToolIcon />}
</Fab>
</Tooltip>
<Fab
color="primary"
aria-label="Hands Up"
onClick={() => setShowHandsUpList(!showHandsUpList)}
>
<ListIcon />
</Fab>
<Box
position="absolute"
bottom={100}
right={0}
width={300}
display={showHandsUpList ? "block" : "none"}
>
<HandsUpList state={handsUpList} />
</Box>
<FormDialog
isOpen={showFormDialog}
onClose={() => setShowFormDialog(false)}
onRaiseMyHand={(name) => setNameAndRaiseHand(name)}
/>
</Box>
);
}
export default App;
Done. We now have a simple screen for our app. The app should look like this:
The next step is to connect our app with the Firebase real-time database. Create a new file called “firebase.ts” and create two functions, one to update the database state and another one to get the current state:
import { initializeApp } from "firebase/app";
import { getDatabase, onValue, ref, set } from "firebase/database";
// Your web app's Firebase configuration
const firebaseConfig = {
//… Your firebase credentials here
};
// Initialize Firebase
const app = initializeApp(firebaseConfig);
const database = getDatabase(app);
const collection = "raise-your-hands";
export const getCurrentState = (onStateUpdated: (state: string[]) => void) => {
const dbRef = ref(database, collection);
onValue(dbRef, (snapshot) => {
const data = snapshot.val();
onStateUpdated(data);
});
};
export const setCurrentState = (state: string[]) => {
set(ref(database, collection), state);
};
Finally, getting back to the App component, we need to call getCurrentState on the useEffect hook and setCurrentState on the toggleMyHand callback. Also, we need to manipulate the state of the “handsUpList” in order to not allow duplicate names. It should look like this:
const toggleMyHand = useCallback(() => {
if (!nameRef.current) {
setShowFormDialog(true);
return;
}
const newIsHandsUp = !isHandsUp;
const newState = newIsHandsUp
? [...handsUpList, nameRef.current]
: handsUpList.filter((n) => n !== nameRef.current);
setCurrentState(newState);
setIsHandsUp(newIsHandsUp);
}, [isHandsUp, handsUpList]);
useEffect(() => {
getCurrentState((state) => setHandsUpList(state));
}, []);
useEffect(() => {
getCurrentState((state) => setHandsUpList(state));
}, []);
Well done! The app is now linked to the Firebase real-time database. Now we have to change the index.ts of our application (the entry point) to create a new div to render our app inside the Google Meeting session. Check the code:
import ReactDOM from "react-dom/client";
import App from "./App";
const targetDiv = document.createElement("div");
document.body.appendChild(targetDiv);
const root = ReactDOM.createRoot(targetDiv as HTMLElement);
root. Render(<App / >);
import ReactDOM from "react-dom/client";
import App from "./App";
const targetDiv = document.createElement("div");
document.body.appendChild(targetDiv);
const root = ReactDOM.createRoot(targetDiv as HTMLElement);
root. Render(<App / >);
Finally, make a build from your application with the below command:
yarn build
yarn build
It will generate a build folder with all of your code like this one:
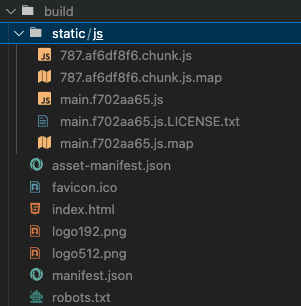
All that is left to do is to convert it into a Google Chrome extension. Open the manifest.json and change its content with this one:
{
"name": "Raise Your Hands",
"description": "Raise Your Hands",
"version": "1.0",
"manifest_version": 3,
"content_scripts": [
{
"matches": ["https://meet.google.com/*"],
"js": ["ENTRY_POINT_FILE_NAME"]
}
],
"permissions": []
}
{
"name": "Raise Your Hands",
"description": "Raise Your Hands",
"version": "1.0",
"manifest_version": 3,
"content_scripts": [
{
"matches": ["https://meet.google.com/*"],
"js": ["ENTRY_POINT_FILE_NAME"]
}
],
"permissions": []
}
For more details about the manifest, you can go through
https://developer.chrome.com/docs/extensions/mv3/manifest/.
Next, replace “ENTRY_POINT_FILE_NAME” with your generated entrypoint file name. Search through the the assets-manifest.json file for “main.js”, and you’ll find it there.
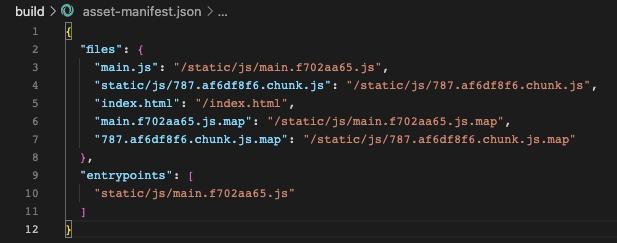
In this example, the main.js file appears as “/static/js/main.f702aa65.js
“. We can use it to replace it inside the manifest.
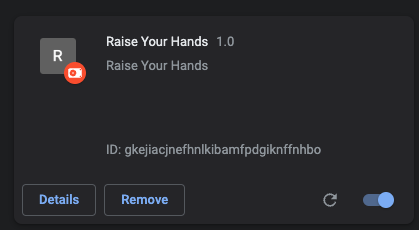
Let’s see it in action by installing it manually on our Google Chrome: Go to your browser extension page at “chrome://extensions/” and check the developer mode switch, then click on “Load Unpacked” and choose our build folder inside the project folder.
After that, you should see our extension correctly installed.
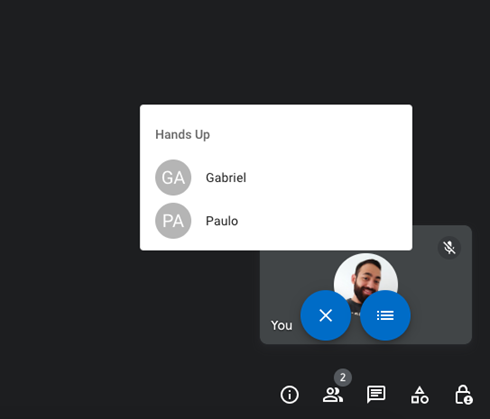
And now when you open any Google meeting session, you’ll be able to see our amazing app running inside the meeting session. We have now bypassed Google’s paywall for an app that should be free, using Google’s own infrastructure. If that isn’t worth raising your hands, don’t know what is!
Flatirons
Jul 26, 2024Flatirons
Jul 22, 2024Flatirons
Jul 18, 2024Flatirons
Jul 11, 2024Flatirons
Jul 08, 2024Flatirons
Jul 06, 2024